Globus for RCI
This step-by-step guide will show you how to use Globus with RCI services and to transfer files reliably and securely. Transferring between RCI services is intended for moving data between some combination of Blackmore, Tempest and OneDrive.
Transferring Between RCI Services
In this section, we provide step by step instructions on how to transfer a file from blackmore to tempest.
- Log in to globus.
- Click on ‘File Manager’ tab from the left panel.
- Select the ‘Two Pane’ option in the "Panels" selector in the top right to allow seeing both source and destination at the same time.
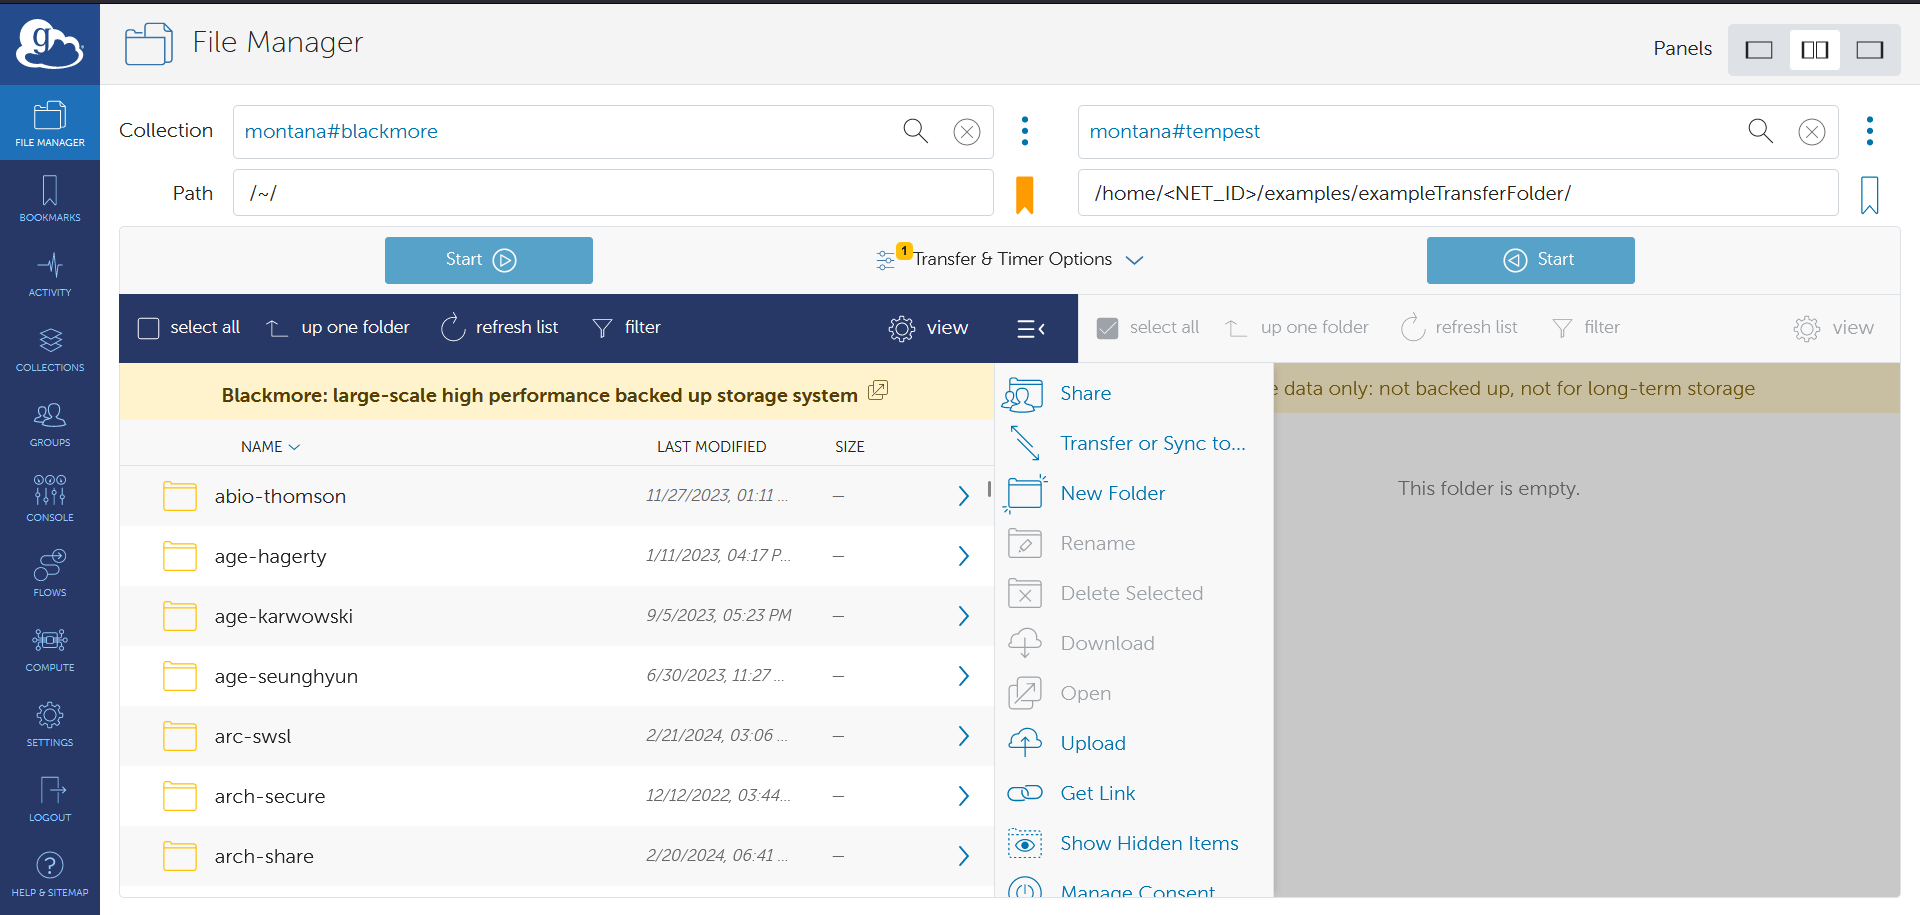
- Select the source collection for the transfer. For this section, you will search for "montana#blackmore" in the left collection search bar.
- Select a destination collection and the path for the files to be transferred to. For this example, you would search for "montana#tempest" in the right Collection search bar, then open the folder you would like to transfer data to.
- Select the source file(s)/folder(s) for transfer from the source collection.
- Click the dark blue ‘Start’ button below the left path text box. Your screen should look like the following for a transfer between Blackmore and Tempest. You will be able to view the status of your transfer in the "Activity" tab at the left of the page and will receive an email when the transfer is complete.
Note: Globus transfers will perform a copy operation by default.

Transferring Between an RCI Service and Your Computer
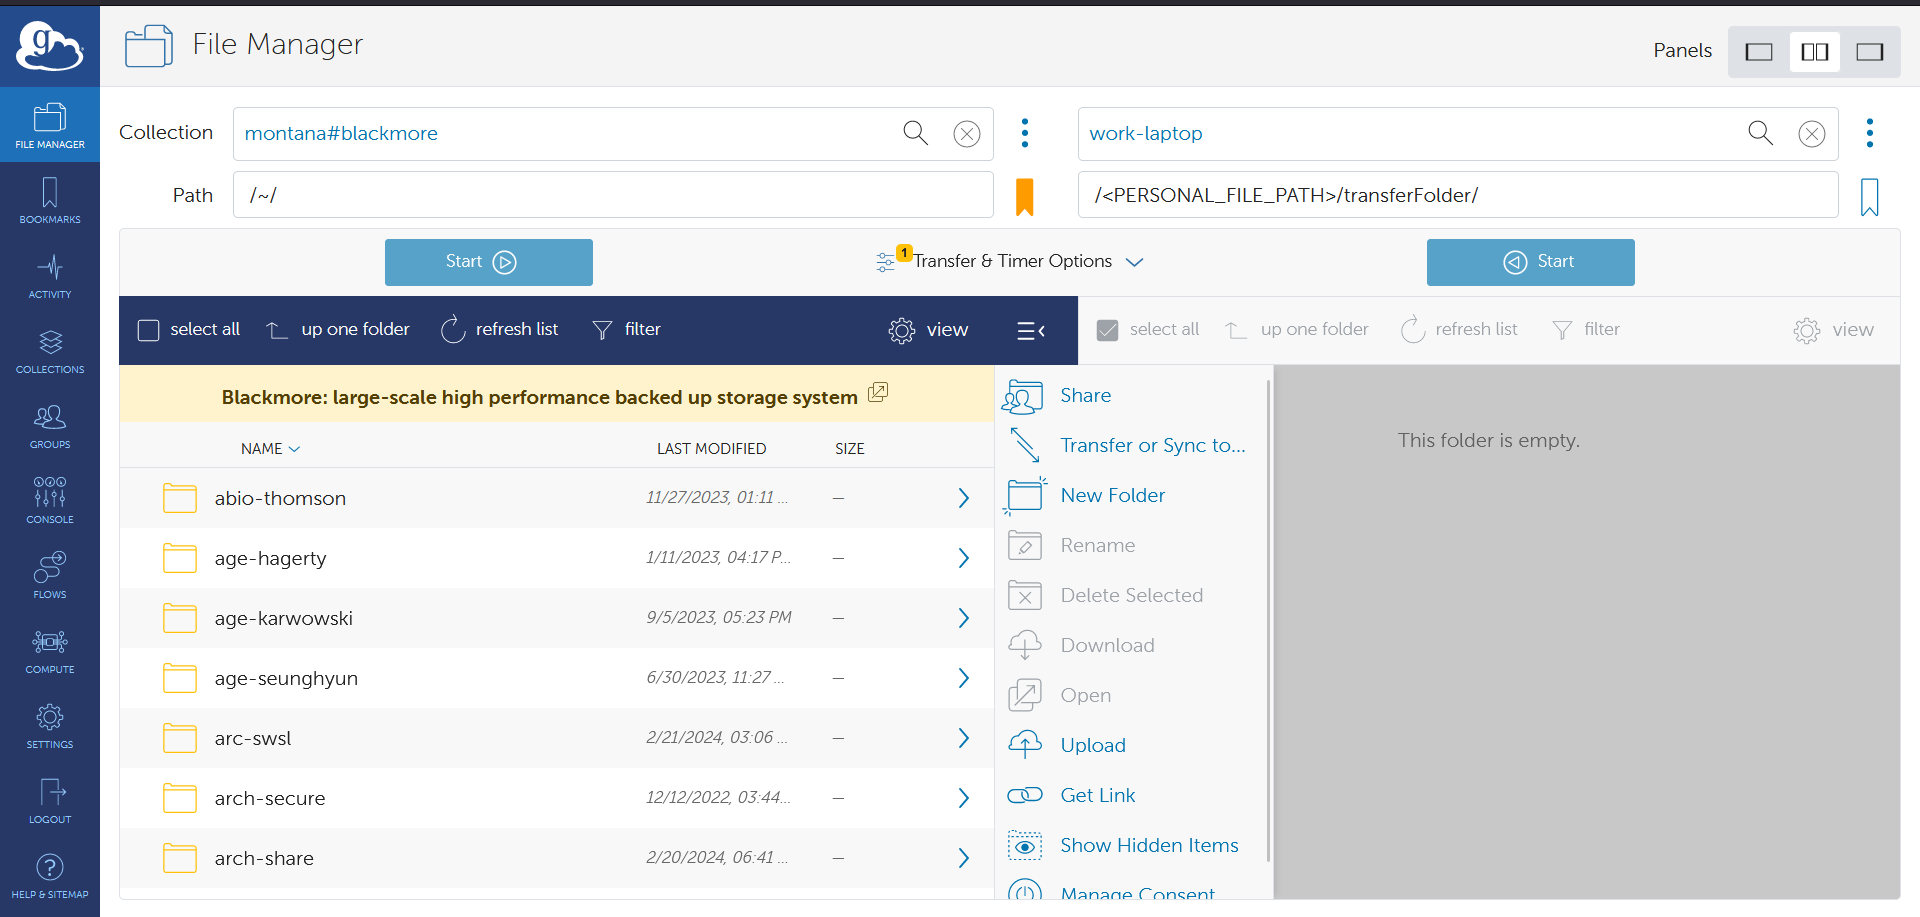
If you wish to transfer between an RCI service and a personal computer, the same steps from above are followed, except for a one-time setup of a personal endpoint on your computer. The following example moves data from Blackmore to a personal endpoint.
-
Navigate to Globus Connect Personal and select the operating system of your choice.
-
Follow the instructions on the following page for the installation to install Globus Connect Personal and create a personal endpoint.
- Log in to globus.
- Click on ‘File Manager’ tab from the top left panel.
- Select the ‘Two Pane’ option in the "panels" selector in the top right to allow seeing both source and destination at the same time.
- Select the source collection for the transfer. For this section, you will search for "montana#blackmore" in the left collection search bar.
- Select a destination collection and the path for the files to be transferred to. To view personal endpoints, click on the collection search bar and select the "My Collections" tab when then click on the personal endpoint you wish to transfer data to or from.
- Select the source file(s)/folder(s) for transfer from the source collection.
- Click the dark blue ‘Start’ button below the left path text box. Your screen should look like the following for a transfer between Blackmore and Tempest. You will be able to view the status of your transfer in the "Activity" tab at the left of the page and will receive an email when the transfer is complete.

Transferring between Personal Endpoints
To transfer between two personal endpoints (such as a campus PC to a home PC) requires that both devices be turned on and have Globus Connect Personal running. The steps for transferring is the same as the above two examples, but with both collections coming from the ‘My Collections’ tab. Before you can transfer data between two personal endpoints, you will need to request Globus Plus access as shown below.
-
Log into Globus and select the ‘Groups’ tab on the left side of the screen.
-
Search ‘Montana State University Standard’ on the searchbar at the top.
-
Click on the ‘Join Group’ button next to the ‘Montana State University Standard’ group.
-
After you’ve requested to join the group, you will have to wait for it to be approved shortly after. Once this is complete, you will be able to transfer between personal endpoints along with the other benefits of the Globus Plus subscription, including transferring to and from a OneDrive location.
