Add Instructions for Faculty and Staff
Step-By-Step Add Instructions
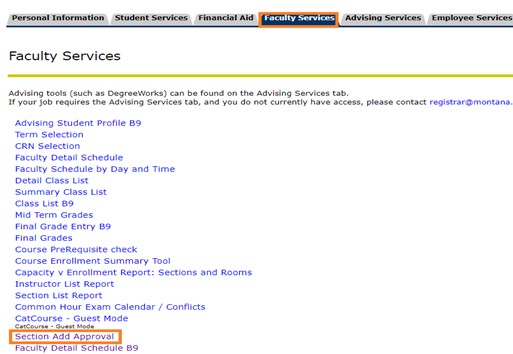
To add a student to your course, log into MyInfo using your NetID and password (the same credentials you use to login to your office/work computer). Once you’ve successfully logged in, select the Faculty Services Tab, then click the “Section Add Approval” link.

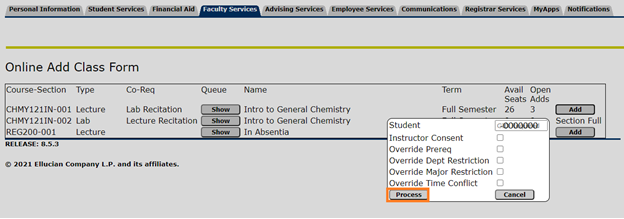
The Section Add Approval will display the courses you’re assigned to as instructor, the number of available seats, the number of requests you have submitted that haven’t been processed (Open Adds), number of students on a waitlist and number of seats available on waitlist, as shown below. Please note, not all sections utilize the waitlist option. Talk to your departmental administrator or call the Office of the Registrar for more information on the banner waitlist features.

1. To add students to a class, select the add button. You will then be prompted to enter the student’s last name.

2. Type in student’s last name and click search. All active students with the last name entered will populate.

3. Click the student you want to add. The student’s ID number is provided to ensure you have the correct student.

4. Check the box(es) associated with the override you’re approving to add the student to the class. Please indicate all overrides you are approving. Remember, if no overrides are needed, the student may add themselves to your course via MyInfo.
- Instructor Consent is required for ANY add after the 5th day of class or if set as a condition for the course.
- Override Prereq- Indicates your approval to allow the student to take your class although completion of the prerequisite is not evidenced in banner (they may not have completed the pre-req or perhaps transfer coursework is not yet posted)
- Override Department Restriction- Indicates your approval to allow a student who is not in your department/school/college to take a course reserved for students currently in your department/school/college.
- Override Major Restriction- Indicates your approval to allow a student who is not in a specified major to take a course reserved for students in a specific major.
- Override Time Conflict- Indicates your approval to allow the student to register for your class when they have a known time conflict, which means they might always be late to or leaving early from your class.
*Please note – we may not override section capacity. If a section is at capacity and you wish to add a student, please contact coursescheduling@montana.edu to increase the section capacity and/or schedule into a new room.
5. Select “Process” to submit the add request or “Cancel” to cancel it.

6. MyInfo will confirm your request and double check that you want to proceed before adding the student to your class. Click “OK” to confirm add request or “Cancel” to abort the request.
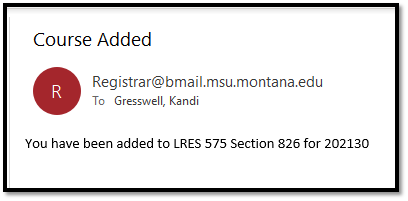
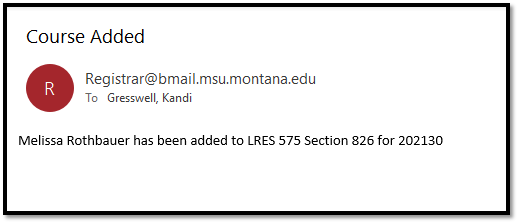
Once you’ve submitted the request, it will be routed to the Registrar’s Office queue for processing. When the request has been successfully processed by the Registrar’s Office, you and the student will receive a confirmation email similar to the examples below.
Student Confirmation Example:

Instructor Confirmation Example:

